IKEA Kallax DIY hack
Wow - when I shared this IKEA hack of how I turned my old Kallax (Expedit) shelf into a fluted dining room sideboard, you all went wild! There were so many questions about the process and the materials I used, so I figured the best way to share my not-so-secret secrets was to write this post.
I love a great IKEA hack (I mean who among us doesn’t?) and it’s always an added bonus when the project also upcycles an older piece that otherwise may have been discarded (both wallet & environment friendly!). I’ve had this shelf since my university days (hands up if you can relate) and it’s served many functions in many spaces over the years but I was growing increasingly weary of the espresso colour as it began sticking out like a sore thumb amongst my other furniture/decor.
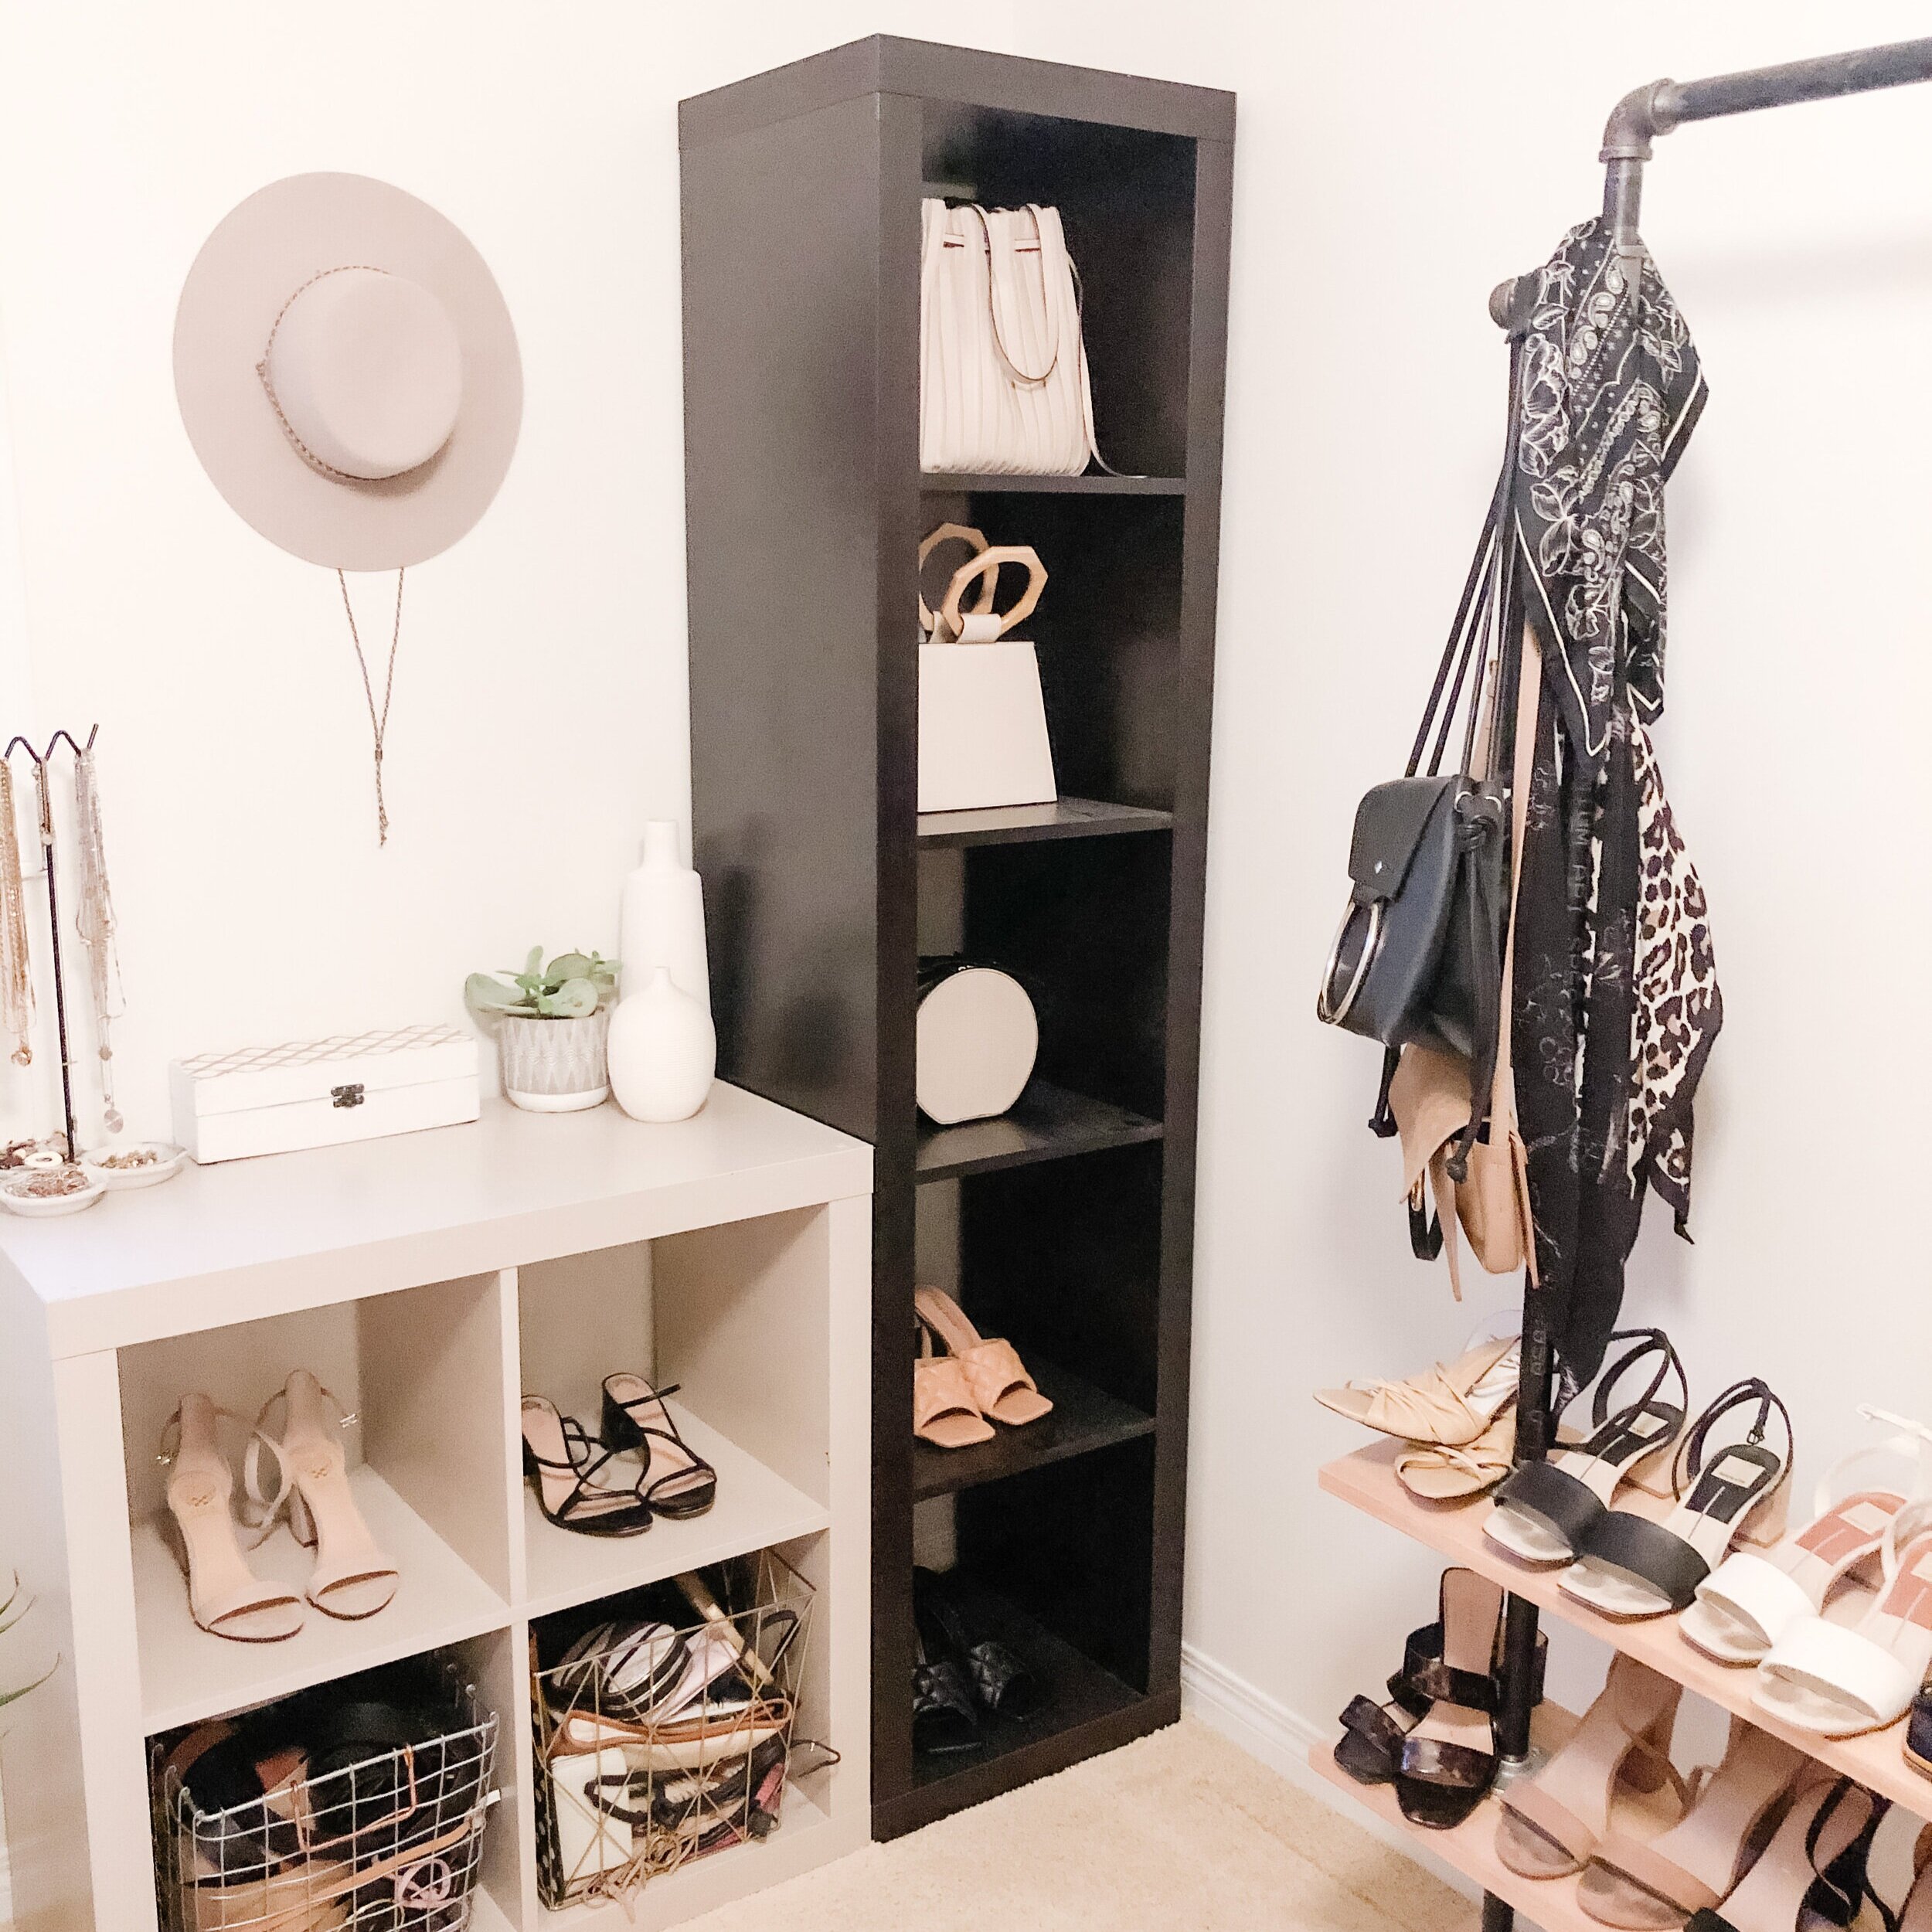
Fast forward through a deep Pinterest black hole and I settled on the idea to give my Kallax a scandi-mod refresh and repurpose it (yet again) in my dining room. For reference, here’s a picture of it before serving its most recent function as shoe/bag storage in my dressing room.
I should note that my shelf is an older version that had 5 shelves (the new version only has 4), so I created balance by making 4 shelves act as cupboards and 1 act as a set of drawers right in the middle.
So, without further ado, here’s what I used to transform my Kallax shelf into a fresh, scandi-mod sideboard.
Materials
Kallax shelf - free (or $70 if you need to buy one)
4 x Kallax door insert - $10/each
Kallax 2-drawer insert - $20
30 x 3/8” squared poplar dowels- $2.79/each
Wood glue - $7.50
White paint - $19
4 x 17” tapered wood legs - $38
6 x matte black pulls - $20 (I got the 5.9” length)

Once you have all the necessary supplies, here’s a step-by-step of how to execute the transformation:
1. Cut dowels to size
Bless IKEA and their love of symmetry. Each shelf space in the Kallax is exactly 13x13 making it simple to create this vertical fluted look using the dowels.
Basically I calculated that I’d need 14 pieces measuring 13” for each door (so 56 total for all 4 doors) and 28 pieces total measuring 6.5” for both drawers. The dowel lengths I purchased were 36” I had enough to create 2 x 13” pieces and 1 x 6".5” length out of 1 piece (technically I only needed 28 dowels, but I bought 2 extra just in case).
I cut them down using a skill saw and gave the raw ends a light sand to smooth any splintery edges.
2. Glue dowels to door/drawer fronts
Using the wood glue I attached 14 dowel pieces to each door and drawer front.
*Trigger warning for those with OCD*: I didn’t measure the spacing (don’t @ me). I eye-balled it to leave a gap about the same width as the dowel in between each one. The glue dries fairly quickly but I left them overnight just to make sure they were completely dry.
If you want, you could fill in any slight gaps between the door and dowel with wood filler (I didn’t because I’m rogue like that). Honestly, not really necessary though.

3. Give everything a few coats of white paint
Next, I gave the Kallax shelf itself (remember it was espresso before) and each newly fluted door/drawer a coat of flat white paint. If you’re like me and painting the Kallax unit itself here are some tips to help it go smoothly:
give the surface a light sanding using a decently rough sandpaper (I used 80 grit, but didn’t push too hard)
give it at least 2 more coats than you would any other piece of furniture. Mine got 4 in total, with a fifth on the top surface (where I’d be placing decor etc.) to make sure it won’t peel off
If you already have a white Kallax, or opt to buy one in white, you’d save yourself a lot of painting time!
4. Assemble & attach door/drawer inserts
Now it’s time to put together the little cubbies that nest into the shelves, which is also what you’ll hang the doors/drawers on.
As with assembling any IKEA product, this took a bit of time to figure out (namely getting the doors calibrated correctly so the open/close smoothly), but by the second one I had the hang of it (badum tiss).

5. Attach legs & hardware
Now for the pretty parts!
I flipped the shelf over and attached the metal brackets for the legs at the for corners leaving about 1” of space from the edge of the legs that would be facing the front so that you wouldn’t see the bracket.
Once the legs were on, I flipped it back over for the final (and most exciting step) - hardware! Since I wasn’t using the pre-drilled hole that came on each door/drawer, I centred the pulls, marked the holes and then pre-drilled accordingly. This made screwing in screw much much easier since the Kallax insert material isn’t wood.
After attaching all 6 pulls I made some small tweaks to the door hinges to accommodate the thickness of the pull so that door operates smoothly.
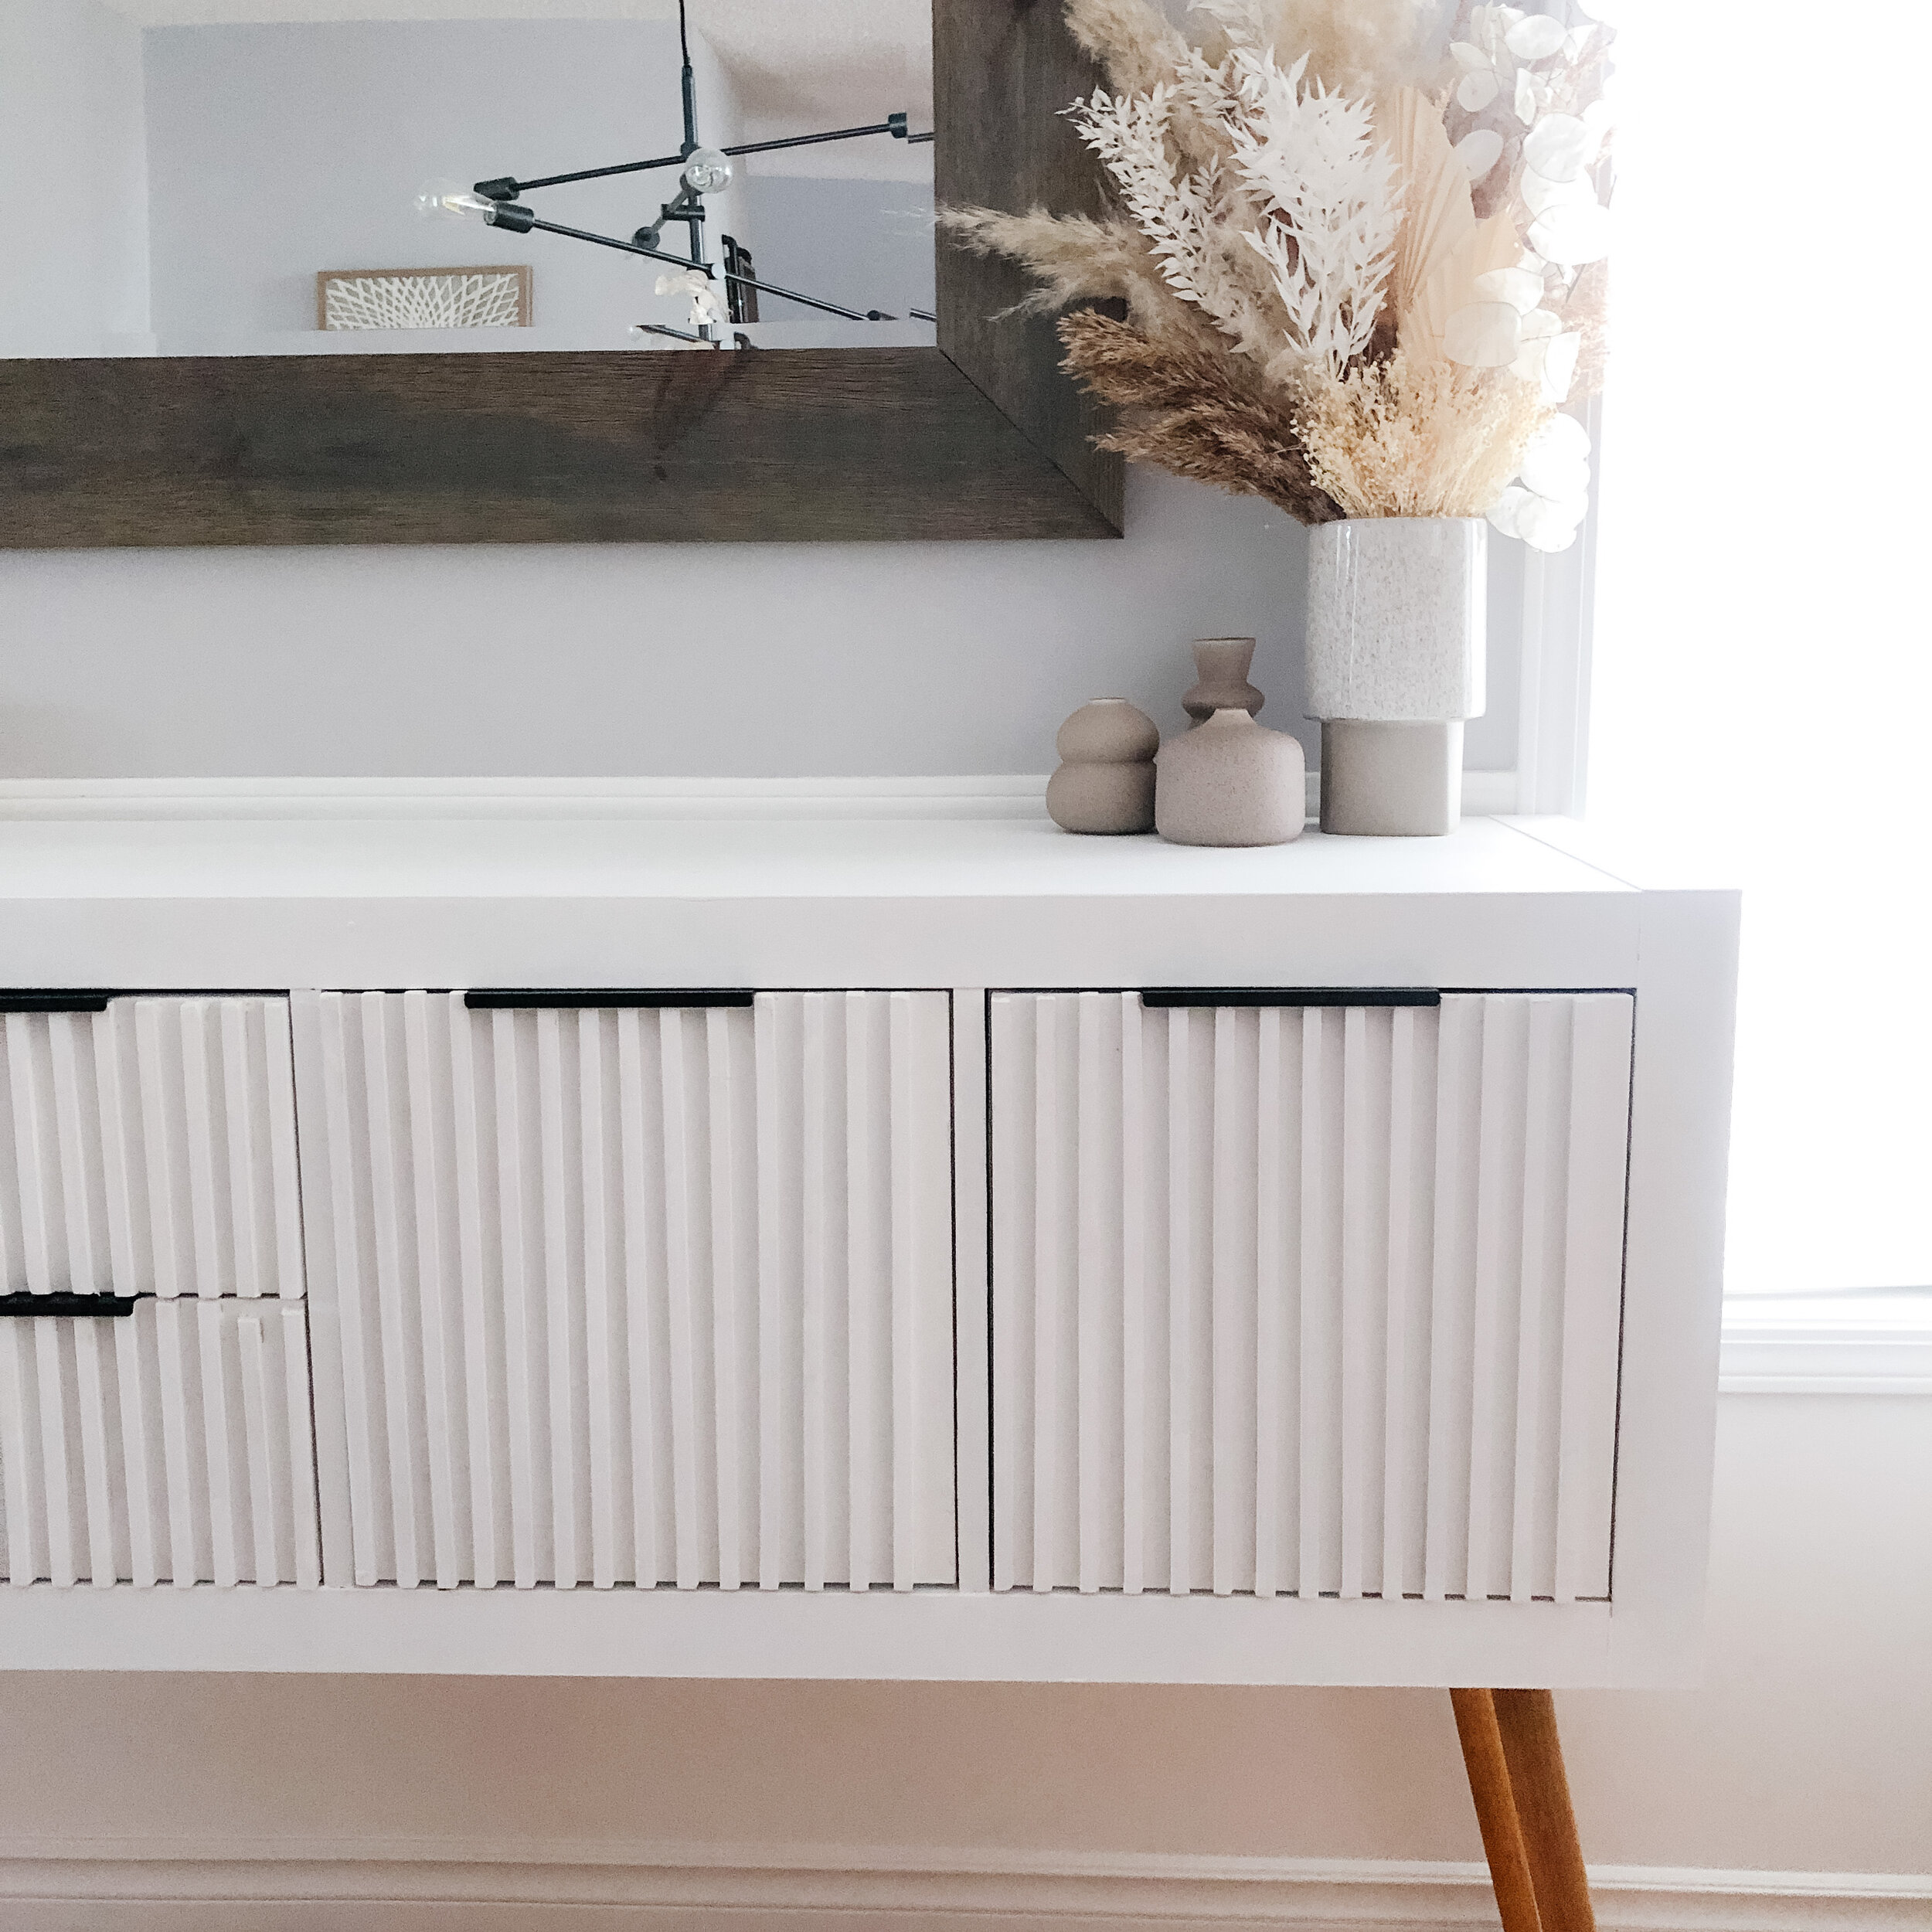
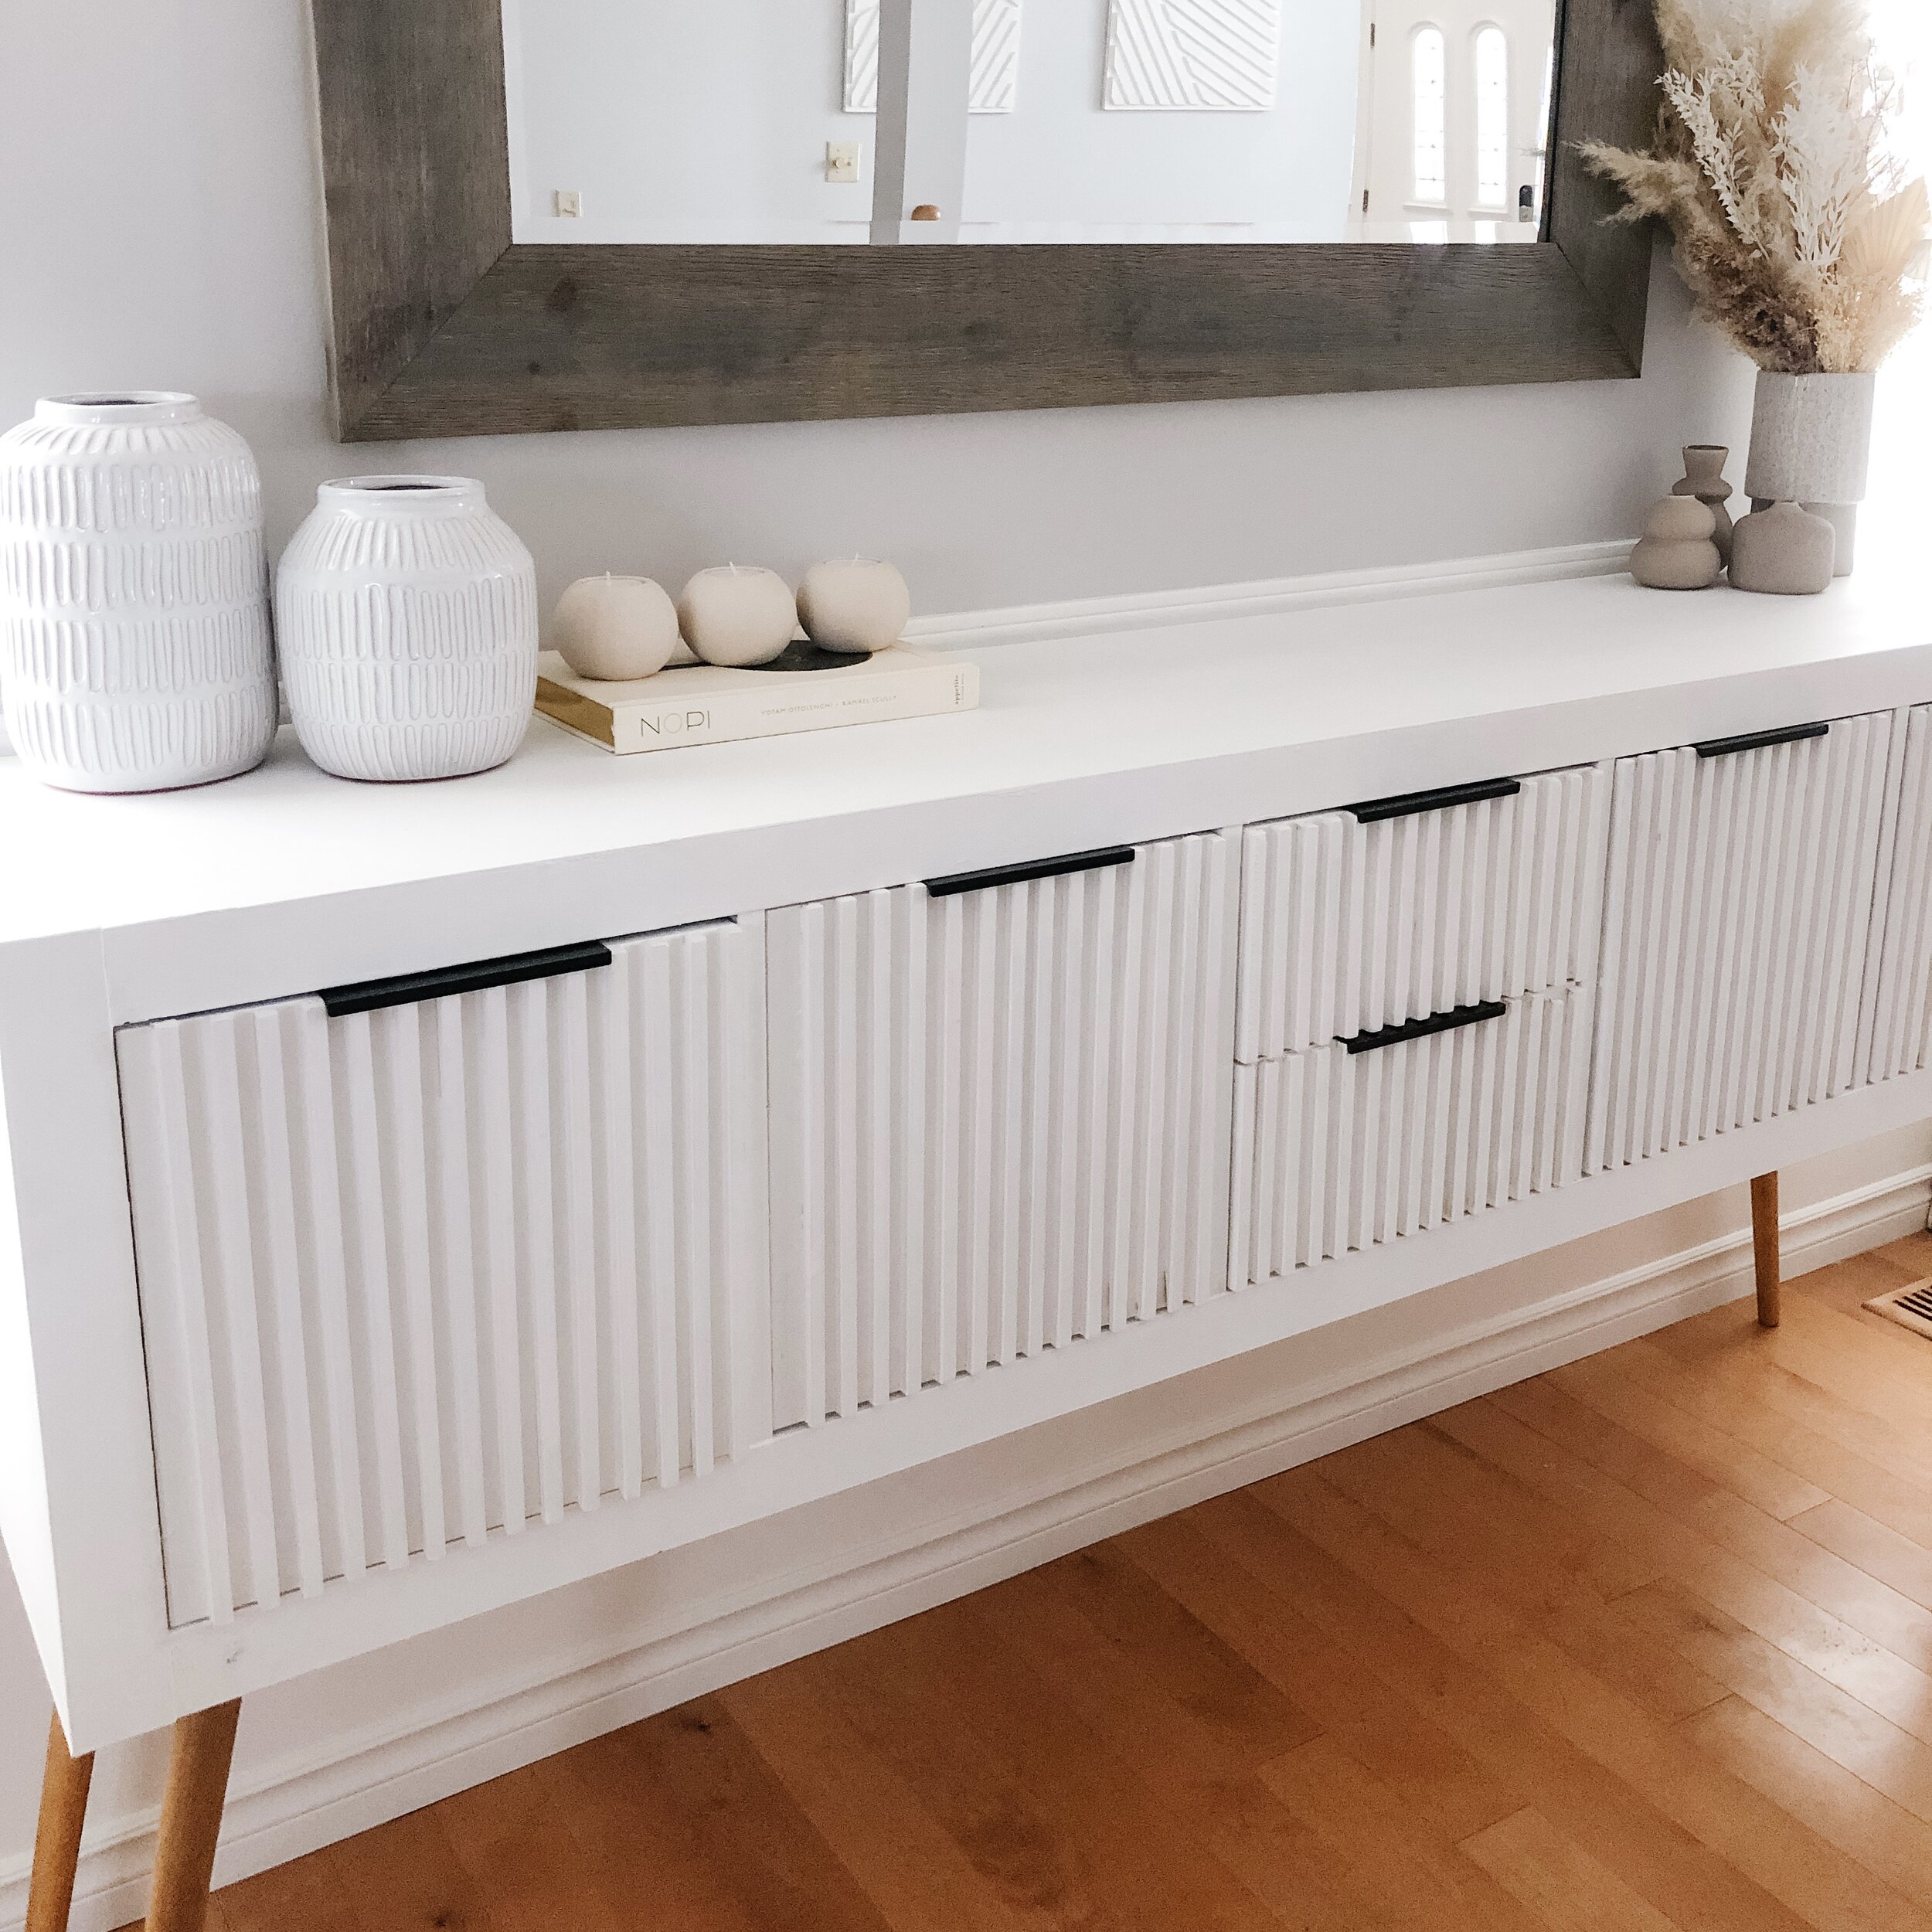
6. Style & enjoy!
Beside the functionality of housing fancy dishes and serveware, I was super stoked to add this buffet to my dining room because it meant a new surface to display decor (woo!). I added some vases (complete with dried boho florals), a cook book and some ceramic tea light holders to complete the look.
Even though it took me nearly 3 months to complete this project, I’m so pleased with the result - especially considering it rang in under $250 (quite a bit less than purchasing a similar piece of furniture brand new or even second hand). Can’t wait to host a dinner now (fingers crossed we’ll be able to sooner than later)!
If you want to watch this project come together in a completely unrealistic timeframe - check out this reel. I’m already brainstorming my next IKEA hack - if you have any IKEA pieces you’d love to see some hack inspo for, let me know in the comments!